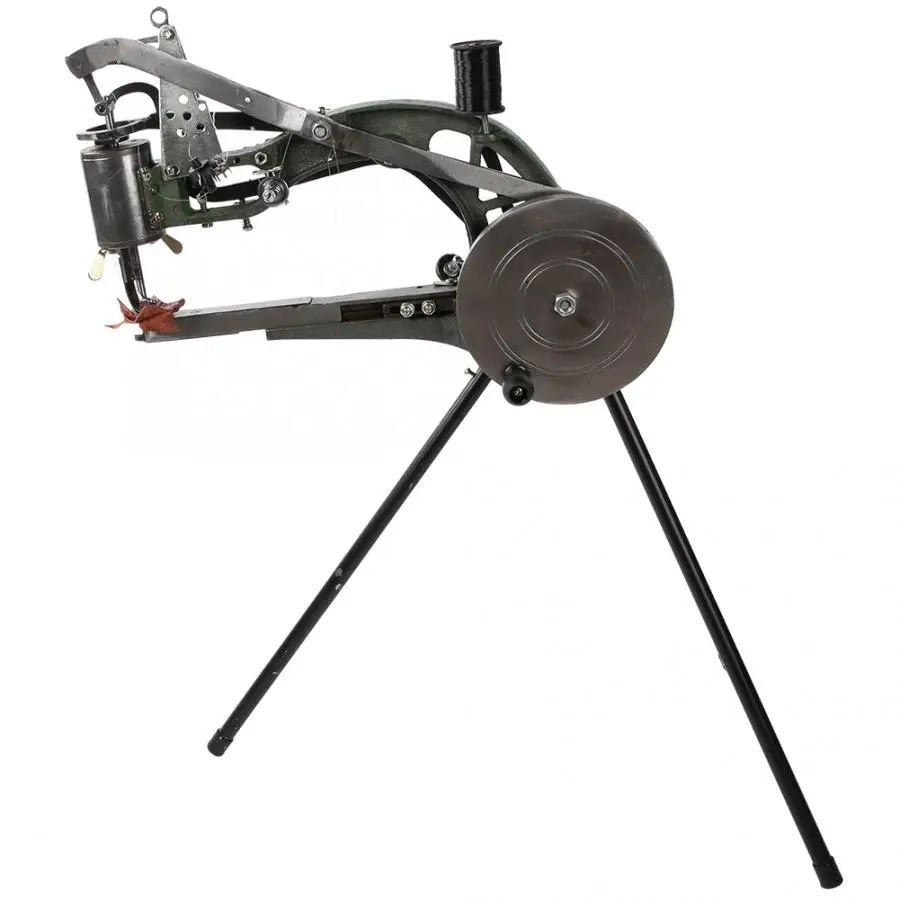
Features: Professional setting, good performance, easy operation and high efficiency.Ordinary shoe machine can only use nylon thread, it is easy to use in addition to nylon thread, but also can use cotton thread which can solve the small problem of stepping on the hard state of leather. It makes the shoes feel uncomfortable. Ergonomic rubber handrails are comfortable and safe.Good material, good performance, easy operation and long service life.Simple and compact structure, high efficiency.This shoe machine can sew various sizes of shoes, rubber shoes, leather shoes, travel shoes, scoop shoes, high heels and raincoats, leather bags, and other leather products. Specification: Material:Iron Color:As shown in the picture.
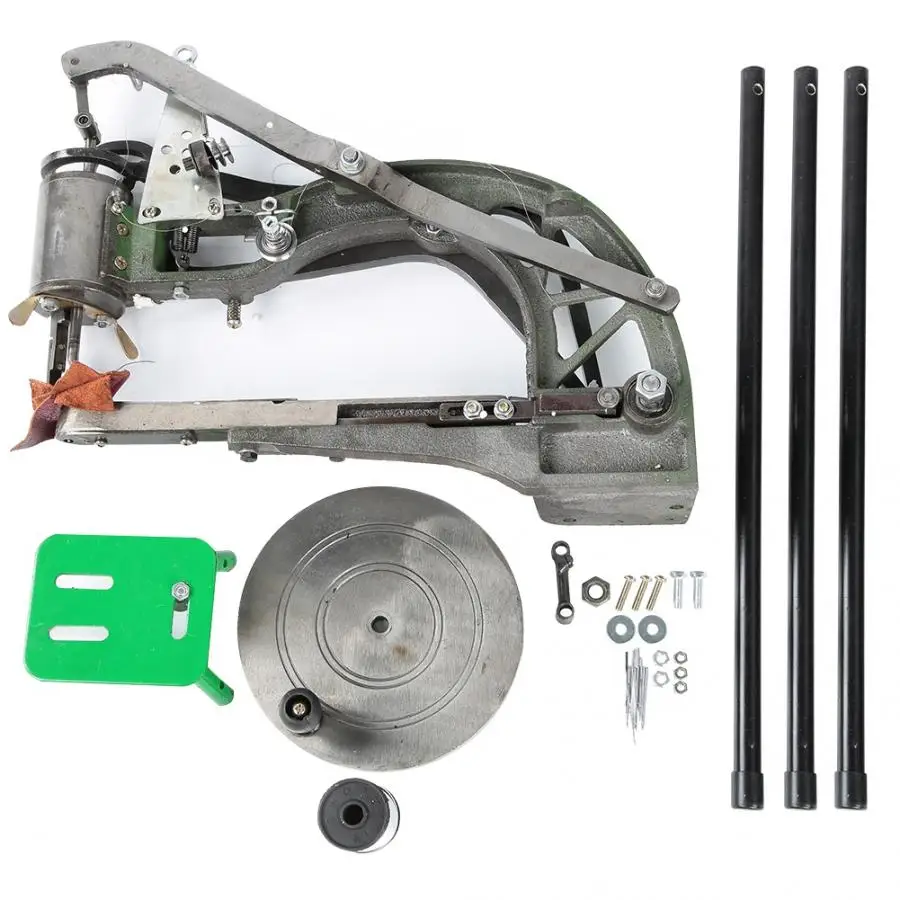
Package List: 1 x Manual Shoe Sewing Machine 1 set of Bobbin 1 x Tripod Stand 1 set of needle 1 x Coil(Random Black&White) 1 x Screwdriver(Random color) 1 x Guide Tray 1 x Connecting Rod 1 x Users Manual
Users Manual: When the position is adjusted, gently pull the upper thread with your left hand and press it in front of the shuttle. Turn the dial clockwise with your right hand and lift the thread with your left hand. The bottom line can be pulled out. The bottom line cannot be adjusted because the position is not adjusted. Be sure to adjust and operate again. As for the problem of disconnection: most of them are due to the tightness of the wire surface. Please loosen the screw of the adjustment upper thread. It may also be a needle problem. It is not aligned with the center and is biased to one side. Please ensure that the needle is in the needle slot. The center of the body; it may be related to the upper thread and the material to be sewn. It is easy to break the line with a thin thread.
1. Use and maintenance: The active part of the shoe-removing machine needs to be refueled once a day to ensure that the machine is running lightly and without noise. In particular, the shuttle must be changed once, and the oil should be added once to avoid stem thread and easy wear, improve work efficiency and extend service life.
2. Preparation before operation: Pull up the presser foot to avoid friction between the presser foot and the needle plate. Check the fastening of the fixing screws of each part. Each part of the fuel point plus lubricants. Shake the guide plate without any clicks.
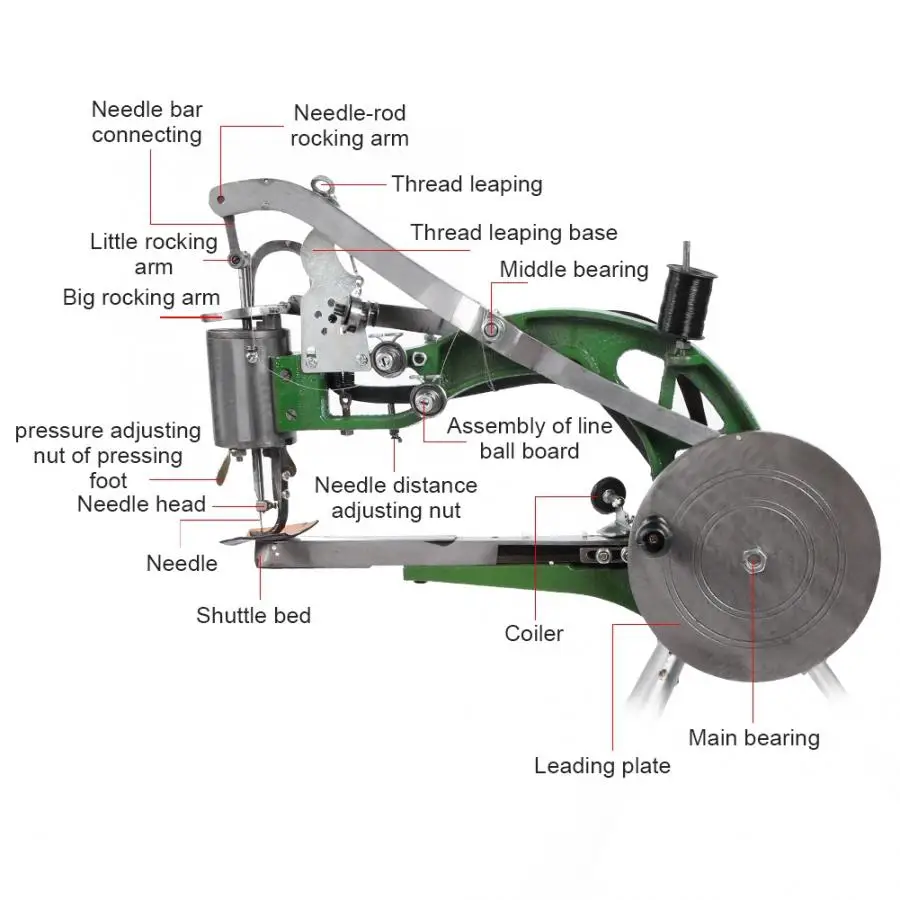
3. Threading and lead: Take the bobbin case and the bobbin: Swing the guide plate, raise the needle to the highest position, use the tweezers to remove the shuttle, lift and push the upper needle plate, and use the tweezers to remove the shuttle. Bobbin winding: Pull down the winding machine, pull out the thread around the bobbin and insert it into the bobbin for several weeks. Shake the guide to be wound around the bobbin and pull it back. Install the bobbin first pass the bobbin thread through the wire hole of the shuttle, and insert the bobbin into the shuttle, then thread the thread to the upper thread hole, and pull the thread to move. The position of the shuttle is the hand guide. When the needle is about to rise, the tail should be aligned with the needle slot, and the thread is pulled out 2-3 inches long. Press the needle plate in the half-moon slot of the shuttle, then close the upper needle plate. Shake the large plate to bring the bottom thread to the needle plate. If the position of the shuttle is placed incorrectly, the bottom thread cannot be taken at the same time. Wear the upper thread: Shake the guide, raise the needle to the highest position, and lower the presser foot. Pull the wire end in the online roll, pass through the middle shaft wrap spring, pass the wire clamp and the wire frame, pass through the wire spring and the wire pick, enter the needle bar hole, and then pull the wire through the pin hole to pull out the wire head 2-3 Inch. Pull the upper thread of the upper thread with left hand(not too tight), use the right hand to shake the guide, so that the needle thread passes through the hole of the needle board to draw the bottom line, and the bottom line together makes the machine press the foot gap to the left rear.
4.The relationship between the bottom line and the quality of sewing: Identification of stitches. Adjust the pressure of the bottom line of the surface. Rotate the upper thread tightly. When the use time is too long, the bottom line will appear too fast. At this time, the thread can be threaded or the bobbin can be changed. The bottom line is tight and the thread take-up lever will be taken. The fixing screw is relaxed, the needle picking rod is pushed backwards, and then the rotation of the bobbin is checked for flexibility. The sanding of the threading nut is used to tighten the adjustment of the stitch length of the crimping nut.
5. Adjusting the stitch length Since the stitch length must be adjusted due to the different sewing materials, when the stitch length is selected, the stitch length screw only needs to be loosened. When the stitch length is short, and the upward movement is reversed, it is sufficient. 6. Adjustment of presser foot pressure When the seam is thickened, the pressure must be increased. At this time, the presser spring nut can be tightened to increase the tension of the tension spring, which increases the pressure of the presser foot, and vice versa.
6. Adjustment of presser foot pressure When the seam is thickened, the pressure must be increased. At this time, the presser spring nut can be tightened to increase the tension of the tension spring, which increases the pressure of the presser foot, and vice versa.
7. Handling of the needle and the matching of the sewing material: 1. Turn the guide disc to raise the needle bar to the highest position, loosen the needle collet screw, remove the old needle, insert the new needle flat into the groove of the needle bar, and when the needle touches the needle positioning position at the bottom of the groove, then Tighten the screws. 2. Needle and sewing material: Generally use the 18th needle, sewing all kinds of rubber shoes and edging shoes and other thinner type 14-16 needles, sewing all kinds of shoes and canvas and other thicker with 18th needle.
8. Soto position adjustment: (Many people will not be able to draw the bottom line, the reason is that the position is misplaced) When the shuttle is off-line, the tail of the shuttle must be aligned with the needle slot, the difference is a lot, is the position of the shuttle Wrong, it is necessary to make adjustments when not in time, loosen the live block and the tie rod link screw, move the lever so that the tail of the shuttle is aligned with the needle groove, and then tighten the screw.
9. Adjustment of the needle bar up and down: During the needle movement phase, the needle eye hole should be aligned with the plane of the shuttle bottom plate, otherwise it should be adjusted by loosening the screw on the small connecting rod shaft and moving the needle bar to the correct position and then tightening.